Zach McGovern
Certified Finest Installer
The owners of this vehicle contacted me in search of the best protection for their newly acquired vehicle. One of their friends had told them about Opti-Coat and how he would never own a vehicle without having it coated, but upon their research, these 2 decided that CQuartz Finest sounded like the better choice for them. Since this vehicle would be coming to me from out of town, I was not able to do an inspection prior to booking the appointment as I normally would, so the condition of the vehicle was unknown until it arrived. This low mileage vehicle (8,009 on the odometer when it arrived) had been owned by the dealer as a 'loaner' for the majority of its life until it was recently purchased by my clients. Unfortunately, the paint had clearly seen a fair amount of abuse at the dealership from what appeared to be damage left by automatic brush car washes. The pictures do not do the damage justice. The scratches were quite deep, especially on the plastic panels (side skirts & bumpers). I was able to remove a large amount of damage with a heavy correction process, however under the right lighting, there are still heavier defects that are visible. I am very pleased with the outcome of my hard work, and the car looks great!
Process
Tires: Tuf Shine Tire Cleaner & Tire Brush
Wheels: Sonax Full Effect, Wheel Woolies, EZ Detail Brush, Boar's Hair Wheel Brush, etc.
Wash: CG Citrus Wash with CarPro Merino Wool Wash Mitt (2 bucket method)
Bug & Tar Removal: Meguiar's D103 (4:1) and Stoner Tarminator
Iron Removal: CarPro IronX
General Decontamination: Fine Grade Detailing Clay with NanoSkin Glide for Lubrication (7:1)
Paint Thickness Readings Taken
Tape off all trim and areas of concern
Cutting/Correction Process: Vertical Panels (most severe damage): M101 on Meguiar's MF Cutting Pad (two steps!), Spot Treating with CarPro Flash Pads and M101, HD Adapt on Orange LC Pad
Horizontal Panels (moderate damage): HD Adapt on Orange LC Pad all via Rupes LHR21ES and Rupes LHR75E
Foam Soak: CG Citrus Wash
Wash: CG Citrus Wash with CarPro Merino Wool Wash Mitt (2 bucket method)
Dry: Metro Master Blaster 8HP and Metro Side Kick Blower
Finishing Polish: CarPro Reflect on Yellow Rupes Pad via Rupes LHR21ES and Rupes LHR75E
Paint Prep: CarPro Eraser Wipe Down
Ceramic Paint Coating: CQuartz Finest (2 coats)
Coating baked with Infrared Curing Lamp
Protective Wheel Coating: Opti-Coat Pro
Ceramic Trim Restorer & Protective Coating: CarPro DLUX
Glass: Meguiar's D120 & DI Glass Towels
Exhaust Tips: CG Metal Polish + Protection via MF Towel
Tire Dressing: CarPro PERL (neat)
Before
The vehicle had made a 1.5 hour journey to me, but was actually quite clean upon arrival. There were a few bugs, as you would expect.

The faces of the wheels were in pretty good shape.

The barrels of the wheels needed to be cleaned up some.

During
The vehicle was properly washed and decontaminated. During the process, tar was removed (as was iron particles and general bonded contamination)

Tar removed from lower panel


While inspecting the paint, it was clear this was going to be a challenge. What appear to be normal swirls were actually much deeper and more severe than typical wash induced swirling.

Notice how dull the paint looks. These plastic panels were in the worst shape. I imagine it is because the plastic substrates allow for easier damage compared to metal substrates.

I was going to begin my testing on the door. As you can see, it needed a lot of help.

My initial test spot made a nice improvement, but there were still many deeper defects that were bothersome to me, so I continued to experiment.

I finally settled on a 2 step heavy cutting process that would later be followed up with a fine finishing polish to remove the haze left from the compounding as you can see here.

Before correction, very dull.

After compounding, the panel is beginning to look better, the reflections are more crisp and the majority of the defects are gone.

True color transformation taking place.

Fender before correction

Fender after compounding

The heavy cutting was leaving a lot of dust.. further cleaning would be required before moving on to the polishing process.

Side panel before correction. Very dull

Side panel after compounding. Much better

Door before correction

Door after compounding

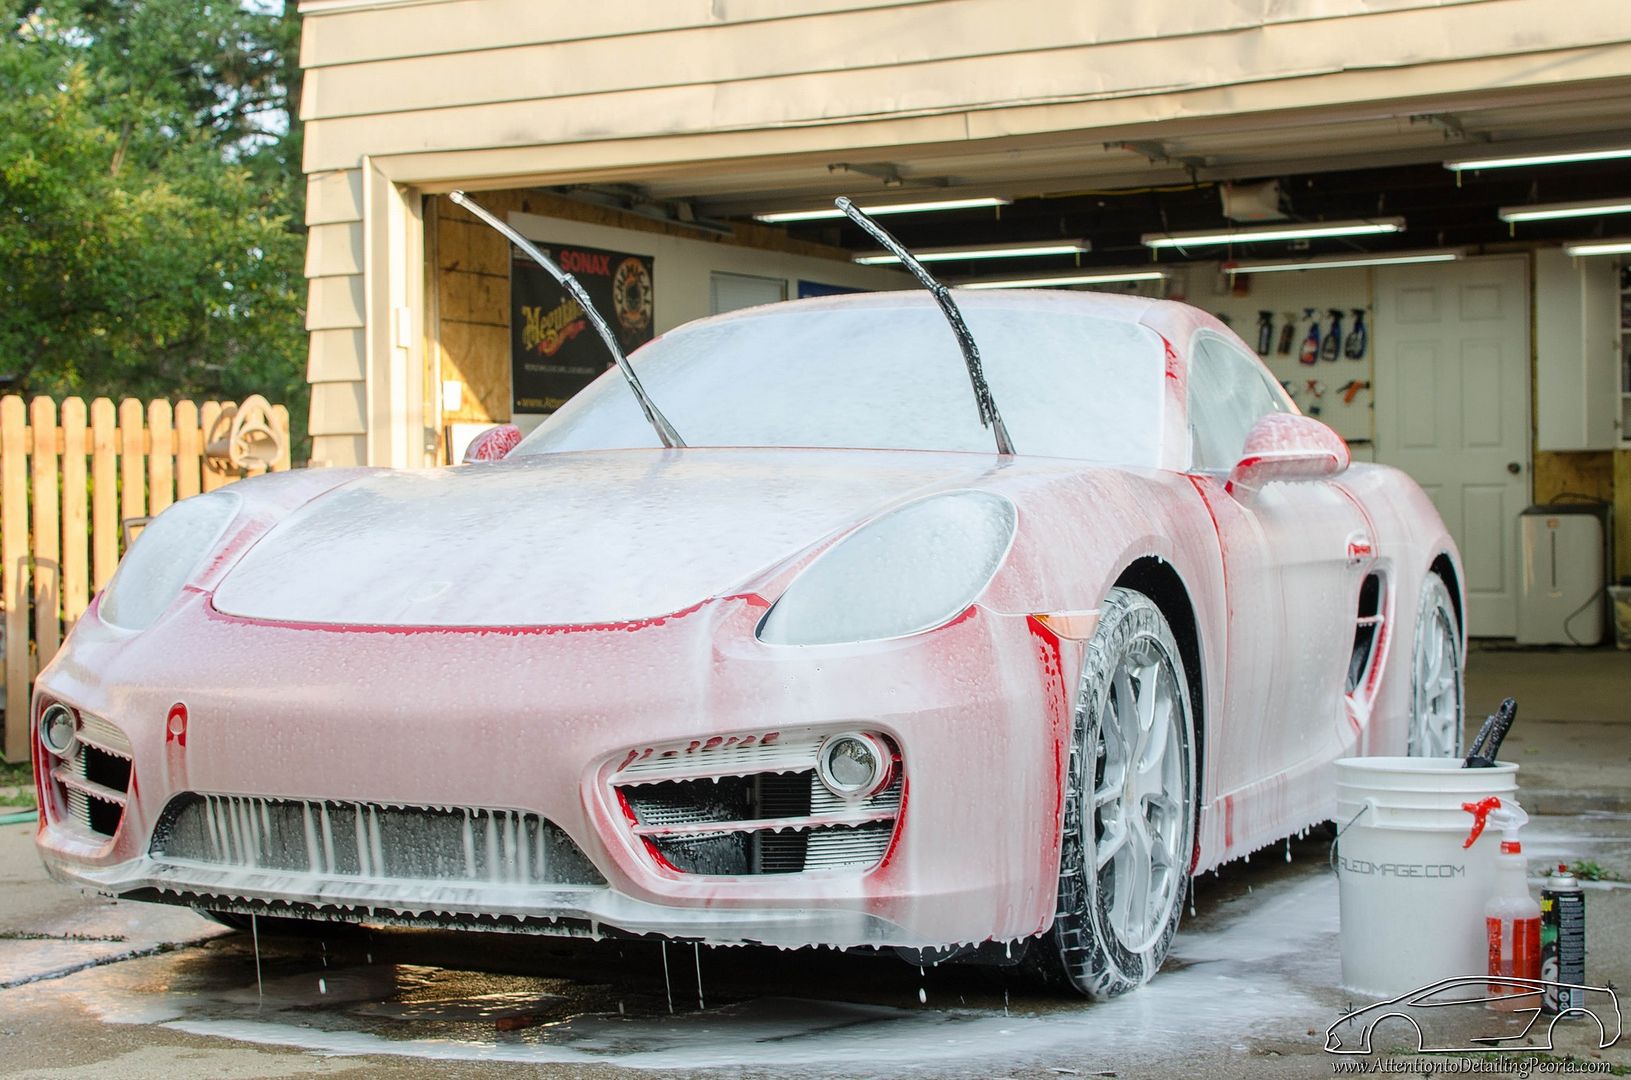
In order to remove the thick layer of dust that had settled on the car throughout the correction phase, the car was foamed and carefully hand washed, then blown dry. This process also helps to remove any remaining oils on the surface.
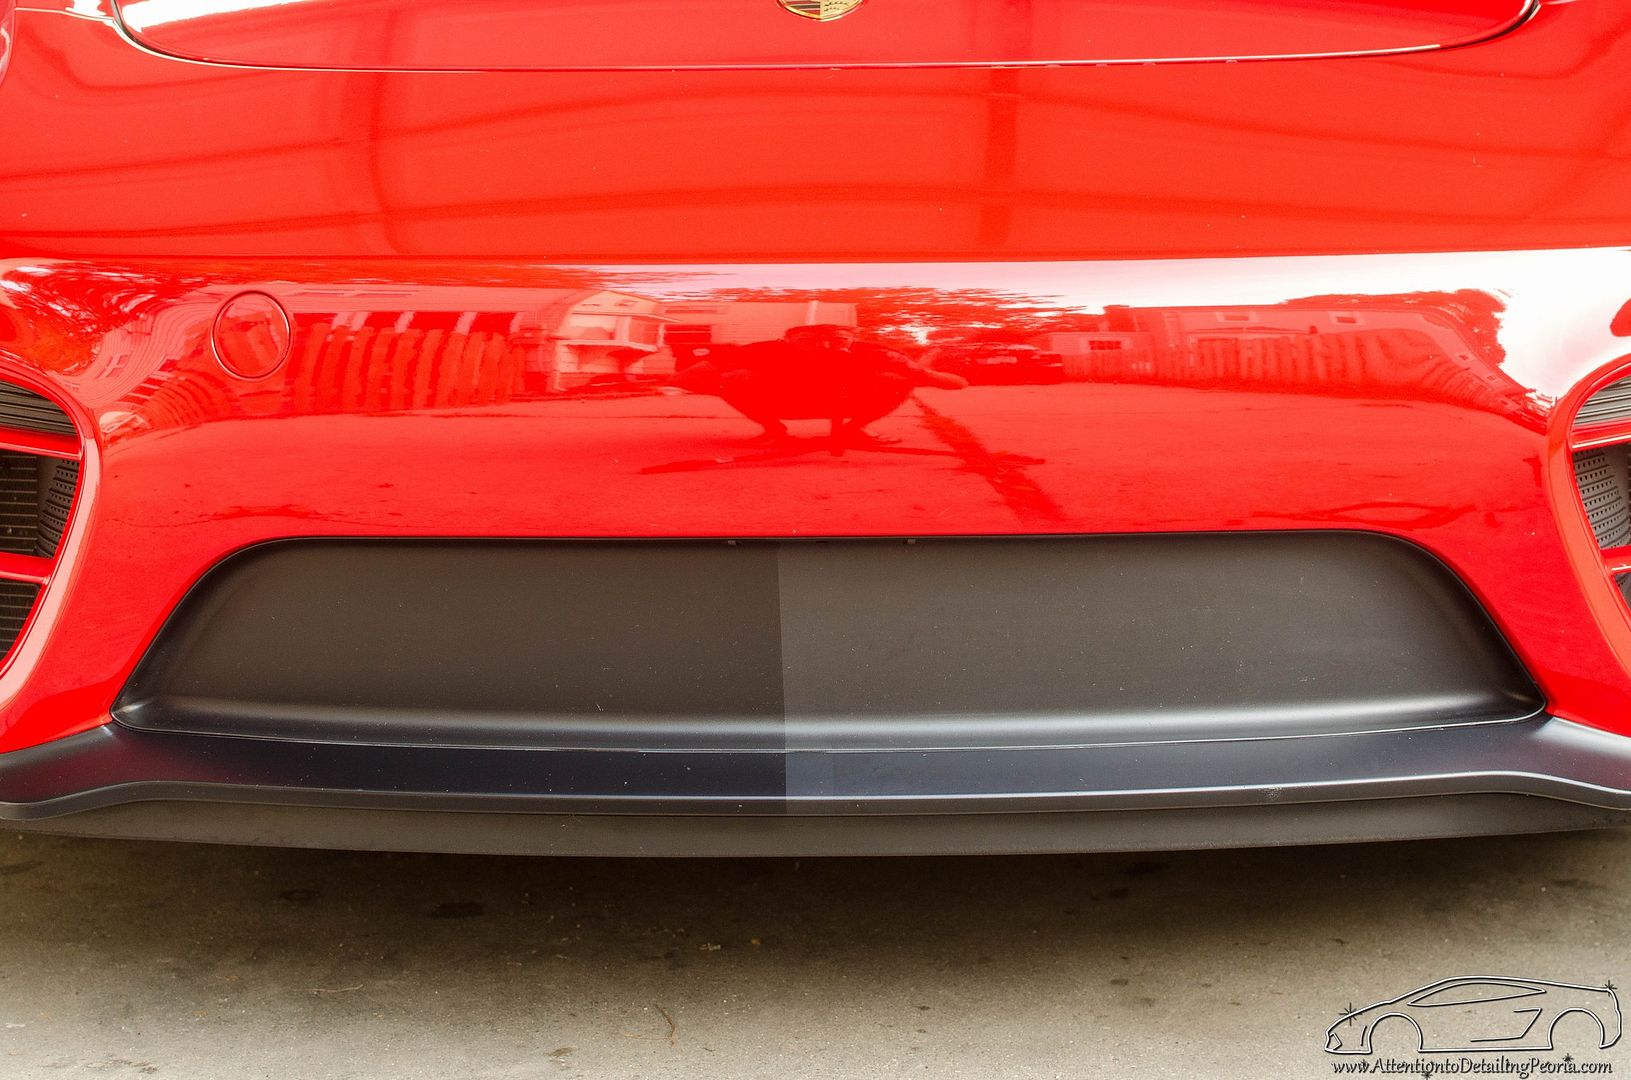
The vehicle was then polished with a fine finishing polish to really bring out the clarity and depth in the paint. Notice how much deeper the left side (polished) is compared to the right (compounded only)

Process
Tires: Tuf Shine Tire Cleaner & Tire Brush
Wheels: Sonax Full Effect, Wheel Woolies, EZ Detail Brush, Boar's Hair Wheel Brush, etc.
Wash: CG Citrus Wash with CarPro Merino Wool Wash Mitt (2 bucket method)
Bug & Tar Removal: Meguiar's D103 (4:1) and Stoner Tarminator
Iron Removal: CarPro IronX
General Decontamination: Fine Grade Detailing Clay with NanoSkin Glide for Lubrication (7:1)
Paint Thickness Readings Taken
Tape off all trim and areas of concern
Cutting/Correction Process: Vertical Panels (most severe damage): M101 on Meguiar's MF Cutting Pad (two steps!), Spot Treating with CarPro Flash Pads and M101, HD Adapt on Orange LC Pad
Horizontal Panels (moderate damage): HD Adapt on Orange LC Pad all via Rupes LHR21ES and Rupes LHR75E
Foam Soak: CG Citrus Wash
Wash: CG Citrus Wash with CarPro Merino Wool Wash Mitt (2 bucket method)
Dry: Metro Master Blaster 8HP and Metro Side Kick Blower
Finishing Polish: CarPro Reflect on Yellow Rupes Pad via Rupes LHR21ES and Rupes LHR75E
Paint Prep: CarPro Eraser Wipe Down
Ceramic Paint Coating: CQuartz Finest (2 coats)
Coating baked with Infrared Curing Lamp
Protective Wheel Coating: Opti-Coat Pro
Ceramic Trim Restorer & Protective Coating: CarPro DLUX
Glass: Meguiar's D120 & DI Glass Towels
Exhaust Tips: CG Metal Polish + Protection via MF Towel
Tire Dressing: CarPro PERL (neat)
Before
The vehicle had made a 1.5 hour journey to me, but was actually quite clean upon arrival. There were a few bugs, as you would expect.
The faces of the wheels were in pretty good shape.
The barrels of the wheels needed to be cleaned up some.
During
The vehicle was properly washed and decontaminated. During the process, tar was removed (as was iron particles and general bonded contamination)
Tar removed from lower panel
While inspecting the paint, it was clear this was going to be a challenge. What appear to be normal swirls were actually much deeper and more severe than typical wash induced swirling.
Notice how dull the paint looks. These plastic panels were in the worst shape. I imagine it is because the plastic substrates allow for easier damage compared to metal substrates.
I was going to begin my testing on the door. As you can see, it needed a lot of help.
My initial test spot made a nice improvement, but there were still many deeper defects that were bothersome to me, so I continued to experiment.
I finally settled on a 2 step heavy cutting process that would later be followed up with a fine finishing polish to remove the haze left from the compounding as you can see here.
Before correction, very dull.
After compounding, the panel is beginning to look better, the reflections are more crisp and the majority of the defects are gone.
True color transformation taking place.
Fender before correction
Fender after compounding
The heavy cutting was leaving a lot of dust.. further cleaning would be required before moving on to the polishing process.
Side panel before correction. Very dull
Side panel after compounding. Much better
Door before correction
Door after compounding
In order to remove the thick layer of dust that had settled on the car throughout the correction phase, the car was foamed and carefully hand washed, then blown dry. This process also helps to remove any remaining oils on the surface.
The vehicle was then polished with a fine finishing polish to really bring out the clarity and depth in the paint. Notice how much deeper the left side (polished) is compared to the right (compounded only)
Last edited: